Those of you who have followed my blog in the past may be wondering “where did she go”? The answer is that like most who casually write a blog, day-to-day life demands simply get in the way. Last year I set out on a quest to actually build my photography skills. I bought my first DSLR when I started this blog because I needed “better” photos. I started out with way too many out of focus shots, or shots that were under or over exposed. Despite those early mistakes, I liked photography and decided that I should figure out what I was doing wrong and get on the right track. I will also note that over the past seven blog-free months I had lots of photography post ideas that I will work to bring to fruition.
My inspiration for today’s post came from Leanne Cole in Australia who authors The Photographer’s Mentor. I’ve been following Leanne on Instagram and her blog for over a year now. What first drew me to Leanne was her Melbourne photos (I went there on vacation a few years ago) and her long exposures. Long exposures and night photography were two of the things I wanted to learn in 2018. Leanne just issued a photo challenge for images with clouds, hence the featured image in this post.
I selected this image for the challenge as it has lots of clouds. I took this photo on a recent trip to Chicago for the Out of Chicago photography conference at Buckingham Fountain. More on that event in a future post. Suffice it to say I am still working to gain experience with night photography.
I will share the technical details behind this shot and three things that I learned. This image was shot using a Nikon D7500 (I upgraded right before this trip) at ISO 100 and f 6.3 for 2 seconds. It is important to note that the D7500 has a crop sensor with a crop factor of 1.5. I used my tripod and a Tamron 18-400mm F/3.5-6.3 Di II VC HLD set at 18mm.
Lesson 1 – Use the right lens for your intended shot
While the featured shot of the fountain works, what I really wanted was a shot of the fountain during the light show. I had not been to that location before, so I did not realize the height the water fountain reaches when the show gets underway. To get that shot, you really need a wide-angle lens, especially when you have a crop sensor. This photo was shot one minute and 18 seconds later with identical settings.
Buckingham Fountain with unintended fountain crop
In order to achieve a composition that did not feel cramped from where I stood and avoid a bunch of people in the shot, I needed more angle. Note how the top of the water extends beyond the frame. The moral of the story here is that having the right tools to get the shot you really want is important. I later rented a Tokina AT-X 11-20 F2.8 PRO DX lens which would have been a much more appropriate choice for the shot I wanted. If you can’t buy what you need, companies like Lens Rentals are a good alternative. The effective focal length difference between 27mm and 17mm is huge. If you are interested in trying Lens Rentals, my referral link will get you $25 off on your first rental. My experiences with them have always been positive.
Lesson 2 – Get your depth of field right
As I looked at my images on the camera’s touch screen I was really pleased. When I got back to my hotel, however, and viewed them on a larger screen I was disappointed in the lack of focus on some of the buildings that were part of the skyline. To fix that, I probably needed a smaller aperture — somewhere around f11 would likely be more appropriate. Notice the building to the left with the rainbow lights (it was pride week) and you will see they are quite blurry.
Lesson 3 – Learn to use your digital darkroom tools
Every raw image file can use adjustments to look its best and to demonstrate your intent. The night before, Scott Kelby was our guest speaker and he emphasized using your digital toolkit and to always sharpen. To process my featured image I made some adjustments for exposure and minor cropping in Lightroom, then moved to DXO Color Efex 4 to apply a filter. Then I returned to Lightroom for a final sharpening. For comparison purposes, here is the file with basic Lightroom adjustments and sharpening only.
I hope that you found this post helpful. By the way, if you have additional tips about this image or night photography, in general, to share I’d love to hear them.
Looking for a gourmet special occasion splurge of a dinner idea? Here is one from a favorite five-star restaurant. I absolutely love the Michael Mina chain of restaurants and have visited the San Francisco and Las Vegas locations. I’m typically in Las Vegas at least once a year on business, so while I’m there I always plan for a dinner at the Michael Mina restaurant in the Bellagio. Reservations are a must, and I will arrange my week around this dinner (they are closed on Sundays). Note that this restaurant will blow a sizable hole in your wallet, even if you’re on a typical corporate expense account. That said, the food, service, and ambiance are out of this world.
The dining room at Michael Mina in Las Vegas from Forbes Travel Guide
According to Zagat’s,
“An amazing dining experience” awaits at this Bellagio offshoot of Michael Mina’s San Francisco New American, where an “expertly prepared” menu starring “excellent” seafood (including a “scrumptious” lobster pot pie) is presented by “professional” servers who go “out of their way to discuss what’s special about every dish”; the “beautiful setting” is an “oasis of calm” amid the bustle of the Strip, bolstering agreement that the “steep” tabs are “worth every penny.”
My favorite entré is their phyllo-crusted sole which sells for $58. Another tempting menu item was always the lobster pot pie, which at $88 would scare me away as a bit too self-indulgent. I was thrilled a few years ago when I found the recipe online at the cookstr website and decided to try it at home. It is one of those recipes that I make when I see whole lobsters on sale at my local market for $9.99 per pound as you need a whole lobster for each individual pie. I usually find them at this price here in LA for New Year’s and again in the summer. Note that this recipe is easy to adjust if you just remember use one lobster per pie and adjust the remaining ingredients accordingly.
This recipe is not difficult, but it is a bit time-consuming. The ingredients are naturally a bit expensive because of the lobster so this is a special event splurge — think Valentine’s Day or New Year’s Eve dinners. Be sure to read through the entire recipe in advance as the directions aren’t in the order that you would make the pies and there are a lot of steps. Specifically, the pâte briséee preparation is in step 22, but this really should be your first action. You can make the pâte briséee ahead of time or use store-bought phyllo dough. The recipe suggests using a food processor for this crust, but as I worked on my #piegoals last year, I found that using my stand mixer enabled me to achieve even flakier results.
Another way to speed things up is by asking your seafood vendor to steam, clean, and crack the lobsters for you. This will save you a bit of prep time and you can use the largest shells when you prepare the cream sauce. I keep a jar of Better than Bouillon lobster base in my refrigerator and add a touch of it to the sauce for an extra rich cream sauce. One important change that I recommend is to lightly saute all of the vegetables, not just the mushrooms as you prepare to assemble the pies. Once the pies are assembled, you can sit back and relax while they bake and await the compliments. Enjoy, and have a fantastic Valentine’s Day!
I thought it might be helpful to share my current favorite products for healthy, beautiful eyes. Healthy being the first priority since itchy watery eyes don’t feel good or look good. Here are my current seven favorite eye-related products from the eyecare, skincare and makeup categories in order of application.
Pazeo Solution (Eye Drops) – If you’re an allergy sufferer like me, read on. Otherwise, you can skip to number two on the list. This prescription product comes first as you have to use it at least 15 minutes before you insert your contact lenses. Since I can’t see well enough to do the other stuff without vision help, I’ll start the list here. These drops really help control my allergy symptoms, but at $45 per bottle under my insurance, they are very expensive. I use a manufacturer’s rebate at the link above to bring the cost per bottle down to a more affordable $10.
Dr. Dennis Gross ferulic + retinol triple correction eye serum has really done wonders for me. The brand says that it reduces puffiness, brightens and also smooths fine lines and wrinkles. My number one complaint when I first purchased this product was under eye darkness. This serum did a great reducing the darkness to the point where I can skip concealer when I’m in a rush to get out the door. I’m on my second bottle and highly recommend the product. You do need to give it a bit of time to work (maybe six months) though.
FOREO IRIS Illuminating Eye Massager is a device that massages the eye area to reduce visible signs of crow’s feet, dark circles, and under-eye bags according to the brand. I had already been using the serum above, so while I can’t say that the massager does all of the things claimed, I find it really relaxing and helpful for puffiness. I prefer this over the NuFace device because I don’t need to use a gel with it. I keep it on my nightstand for easy access before bed, although it is recommended for use twice per day.
Nars Radiant Creamy Concealer continues to be my favorite under eye concealer. I’ve written about this one a few times, and it is favored by many. Although I have a couple of others on hand, this is my go-to product and I use it most days of the week.
Smashbox Photo Finish Lid Primer has been a great find for me. I’ve been on the hunt for my perfect eyeshadow base, and I think maybe I’ve finally found it. I was introduced to this one at a recent Sephora PRO makeup class which you can read about here. It gets the job done for me, and the bonus that I’m lovin’ is that it comes in colors so I can get a nice even base color on my lids which complements my skin tone.
The Natasha Denona Sunset Palette was the runaway makeup hit product this summer. It’s a limited edition palette that sold out rapidly, and it became my go-to eyeshadow palette of the season. I love the warm colors and the variety of looks you can create with this. The price tag almost scared me away, but I’m oh so glad that I was able to get my hands on this. Following up on my love for this palette, I was able to get the new Natasha Denona Lila Palette. Although I’ve only used it a few times so far, I was impressed with my ability to put together a nice neutral business meeting appropriate look. Both of these products initially sold out at Beautylish and Sephora. At the time of this writing, they are available, but that could change at any time. If you haven’t tried these dreamy shadows you just don’t know what you’re missing.
Esqido Mink Eyelashes have been a fave of mine ever since my 30-day lash challenge. My skills with lash application continue to grow, and I’ve experimented with a variety of lash products. If you want to finish your eye makeup with a luxe extra then these are the lashes you’ll want to try. My most recent purchase was a relatively new style Esqido offers called Celestial.
These seven products are favorites that I’m using on a regular basis. In addition, I use a variety of additional products like mascara that I’ve not covered here. Let me know what you think, and what your go-to eye products are. While products can help with eye beauty, Audrey Hepburn had a very wise quote that I’ll close with.
I’ve been participating in and posting about my baking experiences with Rose’s Bread Bible Bakers for just over a year now and it has been a fantastic experience. Rose’s Bread Bible is so rich with instruction, recipes, and inspiration. My fellow bakers are a true group of bread aficionados and I learn a little something extra as I read their monthly posts. As I continue this bread making journey, I am surprised by the number of recipes in the book that I had never tried, but have become favorites as a result of this journey.
Our July selection is a good example of this. In browsing through the book over the years, I never had a serious interest in baking this one because based on the title I thought it seemed strange. The secret ingredient for this bread is a poorly kept one as it is listed in the title. Frankly, my pre-conceived notions about the results that ingredient would yield, despite what Rose says in the introduction caused me to miss out on this fantastic bread for no good reason. Perhaps I would have tried it sooner if the name had simply been “Feather Loaf.”
While this isn’t the quickest recipe to make due to the sponge and multiple rises, the results are delicious with a subtle sweetness from a combination of honey and banana. In addition to acting as a sweetener, the banana when coupled with a touch of butter keeps the bread moist. The full name for this wonderful bread is Banana Feather Loaf. I must warn you, the recipe produces a result that is nothing like the photo below. Now there is nothing wrong with a traditional banana nut bread, I do bake and enjoy them, but when thinking about this recipe you have to get this image out of your head. By the way, the texture of this bread reminded me of our June project which I’ll link to here.
The surprise ingredient in this bread which provides subtle flavor
Before we continue further, I wanted to share an article I found which details 16 Surprising Facts About Bananas. Here are three of the 16 facts I found particularly surprising:
Bananas were first introduced to American consumers in 1876 at the Philadelphia Centennial Exposition.
Americans consume over 28 pounds of bananas each year, with over 96 percent of households purchasing bananas at least once each month.
A small banana provides 27 mg magnesium, which may help boost mood. Men and women need 420 mg and 320 mg of magnesium per day, respectively. Low levels of this mineral are linked to depression, anxiety, irritability and other mood disorders. Since many of us don’t get enough magnesium in our diets, consider a banana as your chill pill.
One of these bananas will add subtle sweetness and moisture to this bread
Putting this bread together is a breeze if you have experience with Rose’s recipes and techniques. I had a couple of concerns which as I’ll explain were unfounded. Because I was short on time, I let my starter ripen for about four hours before mixing. Additional time would of course further develop the flavor, and there is no concern about the banana taking over since it is not added until you go to mix the dough.
Although I’m in that 96% of households that typically purchase bananas monthly, I did not have any fresh bananas on hand. I regularly visit the little area in the back of the produce department when I grocery shop to look for overly ripe bananas which have been marked down. This enables me to save a bit on the purchase (although according to the article cited above banana prices have been on a steady decline) and then I prepare them for freezing. I typically peel the banana, slice it and wrap it in wax paper before placing in a ziplock freezer bag. I normally use these frozen bananas for smoothies, but I decided to use one for this recipe. It works fine, however, when thawed, the banana will have a bit of extra moisture which I recommend pouring out before mashing. Also. the banana does brown a bit as it thaws, but the little bit of browning that occurs doesn’t seem to discolor the finished dough.
Preparing the dough was simple and straight forward, although I did feel there was a little less dough than normal for my loaf pan, and that it was a bit slow to rise. Once the dough went in the oven it was necessary to reset the timer and change the temperature several times. This bread really does brown quite a bit, and I fought the urge to tent it with foil as Rose did indicate that it browns quickly which is why the multiple temperature changes are needed. When I took it out of the oven I was a bit concerned about the color and whether it would taste burnt — the color of the crust did not seem to impact the deliciousness of this bread in the least.
If you have an overly ripe banana lying around your kitchen, this is a great recipe to use it for as the other ingredients are likely to already be in your pantry. By the way, if you’ve been following the blog, you’ll know that one of the tests that I put my loaves to is whether it makes a good sandwich. This bread was the foundation for a fantastic grilled ham and cheese sandwich and a really tasty smoked turkey sandwich. It was also nice toasted so it’s a versatile, all around winner that deserves a spot in your baking rotation.
Last year when I started this blog I wrote two posts regarding the free classes for Beauty Insiders at Sephora. Part I of the two remains relevant and provides a good overview of the Sephora curriculum and my summer of beauty learning. For a list of the standard 13 classes offered, click here. The two noteworthy additions to the standard class list this year are Age-Defying Skincare and Classes for Confidence: Brave Beauty in the Face of Cancer. I give kudos to Sephora for adding a class for the special needs of cancer patients. I’ve seen first hand the devastating impact cancer treatment can have on a woman’s confidence, as my mother fought a long battle with the disease and I remember several specific conversations with her on the topic. If you know a woman who is fighting this fight, please share the information on this class with her. I went back to school this summer to repeat a class from last year, and to take two new classes that were offered at the new location in Century City. More on those in just a moment.
For those of you who aren’t familiar with the Sephora store lineup here in the Los Angeles area, the Westfield Century City shopping center has been undergoing a major renovation project for over a year and a half now. While the work isn’t fully complete, the early results are quite nice. One of the first stores to close as a result of the renovation was my favorite Sephora location in Century City. As one of the first to close, they were also one of the first to reopen in their new mall location this past May. As a VIB Rouge member, I was invited to the grand opening. My wallet is thankful, however, that I was out of town that week.
Open but shaded areas to kick back and relax
Seating areas removed from the traffic if you need to get away from it all
Even the restrooms are swanky
This is the new Sephora TIP table at the Century City store
ICYMI, Sephora is actively experimenting with technology as a way to draw you into the store and to enhance your in-store experience. They have an active innovation lab in their North America (San Franciso) headquarters that has been busy testing and playing with new retail technologies. One result of their innovation efforts is the introduction of the “TIP” table. TIP is short for Teach, Inspire and Play, and the first of these tables was installed in San Francisco in late 2015. Century City is now the second U.S. location to have one of these, and I had the chance to experience all of the TIP elements during my recent classes. If you’re interested in learning more about Sephora’s innovation lab, click here.
These classes are truly beneficial as they will give you plenty of tips and techniques, as well as assistance finding the right tools and products for your needs. According to Australian makeup artist Rae Morris:
Makeup is my world, and I know that little things . . . the right technique, colour or brush . . . can make all the difference.
The first class I took at the newly reopened store was the new Age-Defying Skincare class. I am genetically blessed with “good” skin, but I do have to work at keeping it in good condition. Like every other woman, I do have skin care concerns. Mine include patchy dry spots, enlarged pores, under-eye circles and puffiness, and the start of fine expression lines around my mouth. This skin care class focuses on the basic steps which should be part of your daily routine: makeup removal, cleansing, serum application and moisturizing (including an eye cream). There is also discussion about the key ingredients to look for in your products such as exfoliants (i.e. AHA, BHA) and brighteners like vitamin C. Cleansing tools like the Foreo Luna and Clarisonic brushes were also discussed. In addition, we had the opportunity to apply a treatment mask just as we would at home a few times a week, although we weren’t able to leave it on for very long.
My favorite double cleanse products
Key takeaways from the class for me were a good discussion of the double cleansing method with a “makeup melter” followed by a cleanser. My current makeup melters of choice are either Bioderma’s Sensibio H2O or Tatcha’s Pure One-Step Camellia oil for the really stubborn stuff. Also important were the proper techniques and sequences for applying serums, facial oils, moisturizers and eye cream. I learned that I was using my facial oil at the wrong point in my routine.
Sunday Riley’s Power Couple — I use Good Genes and Luna a few nights each week
My skin care buys connected with the class were a re-purchase of Sunday Riley Good Genes and a new purchase of the Peter Thomas Roth Hydra-Gel eye patches. I have been using the Good Genes treatment along with the Luna Sleeping Night Oil a couple of nights each week and that combo has been working well for me for about a year and a half. I originally purchased these as a set (a great way to try this), but I ran out of the treatment product. Although the bottle of oil is old, it seems to still be potent and effective. A little bit goes a long way and I still have half the bottle left. [Note after I started writing this post, Sephora had a sale for VIB Rouge clients so I bought another bottle of Luna as sales on Sunday Riley products don’t happen.] After cleansing my skin, I apply a few drops of the oil followed by a pump or two of Good Genes and wake up to really nice looking skin without any flakey stuff going on.
I decided to try the Hydra-Gel eye patches as a quick and mess free way to work on under eye puffiness. I have been sporadically using the Patchology Energizing Eye Patches, and while I like them, I found I wasn’t great about using them as there is a bit of mess involved. Honestly, I think this is just an aspect of skin care I need to focus more on as I haven’t been using the Hydra-Gel patches as frequently as I should either, although they’re effective and easy to use. I’ve had much better success using my eye serum on a regular basis but I’ll save that for a future post.
The second class that I attended was a special Sephora PRO team class. If you’re not familiar with the PRO team, fear not, I’ll explain as I wasn’t either. There is actually a separate Instagram account for the PRO team which you can find here. According to our class handout:
The Sephora PRO team is an inspirational and approachable team of leading makeup artists who are committed to elevating the artistry expertise of our cast, clients, and the entire Sephora organization, and who represent Sephora’s voice in the beauty industry.
This is an elite group of beauty industry leaders as there are only ten in the United States. In fact, two of them are now based here in Los Angeles. The PRO team is offering these exclusive classes in only two other cities — New York and San Francisco. As a result, you won’t typically find these classes on the regular schedule and they are fully booked affairs. The two PROs who led the class were Myiesha and Jeffrey, and our topic was Trending Looks: Monochromatic. If you’ve been reading my blog for a while, you know that I’ve really had to work at expanding my makeup comfort zone so you can imagine that a class in trending looks was a bit scary for me. The fear was totally unwarranted!
Although the makeup look here is monochromatic, it doesn’t strike me as trendy
The class format was a bit different from the usual approach. Our two PROs each had a class participant as their model and each did one side of the model’s face. Each PRO had a different creative vision based on discussion with their model and their individual creativity. It was great to see the two work side by side creating different looks based on the same monochromatic theme. They would, for example, do the eyes, and then the class participants had the chance to play and do their own eyes using both the virtual try-on at the TIP table and actual makeup. We would then move on to another part of the face, see the PRO demonstrate and then do that portion of our face. One thing that was really helpful was that the PROs came by regularly to offer advice and encouragement as well as to answer our questions. In addition, there were a number of store employees available to fetch products and assist with technique. One of the employees who assisted really helped me improve upon my eye shadow blending technique.
The keys I think for the monochromatic look were color selection, incorporating neutrals, and using a variety of finishes. Myiesha’s advice on color was to start with one that looks good on your cheeks and work from there. For example using multiple eye shadows where some are matte and others have a shimmery finish. Incorporating neutrals is also important to balance the overall look. This class reinforced some of the ideas and looks that I’ve been experimenting with using the new limited edition Natasha Denona Sunset Palette. I tried to capture some of these for you but my selfie photo taking needs work. I’ll plan to share some examples at a future date.
Finally, I decided to retake the Winged Eyeliner class as this is an area where I still struggle. I was the only person who signed up that day so I had a private one-on-one session. The cast member who helped me had the patience of Job, but this is an area that I still struggle with. I need to bring back the 30-day challenge approach that I used for false lashes to become competent here.
If you’re looking to up your game as the fall season approaches, I highly recommend working some of the classes at Sephora into your schedule. Let me know which classes you plan to take and how they work for you!
I recently attended two classes that I signed up for this summer to improve my ability to bake pies from scratch, and I made my very first lattice pie. I think as a result that I’m on track to achieve my #piegoals this year. You can read more about the start of my 2017 pie making journey here.
Cut my pie into four pieces, I don’t think I could eat eight.
– Yogi Berra
I’ve baked four pies at home over the last month to reinforce what I’ve learned from those two classes. Let me first tell you about those experiences. I have taken a number of classes over the years at Sur La Table and was really excited last fall when a new, more convenient location opened in Westwood Village. I also had the opportunity to take my first class at The Gourmandise School in Santa Monica, CA. Both of these classes were taught by professional pastry chefs, and these experiences have really helped me grow my skills this summer.
My first lattice pie made during class at Sur La Table filled with fresh strawberries and rhubarb
The Easy as Pie class at Sur La Table featured a Lattice Top Strawberry Rhubarb pie and a Dark Chocolate Ganache and Salted Caramel Tartlet. These were two very different fillings and used very different techniques so there was a definite broadening of my skills here. Specifically around tempering chocolate, making a ganache, and making caramel. This is a little embarrassing, but I will admit that I had never had a pie with baked strawberries, let alone one with strawberries and rhubarb so it introduced me to a whole new universe of strawberry pie making. The only type of strawberry pie I experienced growing up here in Southern California was like those served at Marie Callender’s restaurants. These are more like a fresh strawberry tart with a glaze and whipped cream on top. I suspect there are regional customs at work here. If anyone can enlighten me further on this I’d love to understand more.
Fresh peach pies with crumble topping (top) and apple pies (bottom) from the Gourmandise class.
The class at Gourmandise was titled (most appropriately I might add) 4th of July Pies and had us preparing two fresh fruit pies — one with apples, and a second with peaches. In addition to making the pie crust entirely by hand, we also made a crumble topping by hand for the peach pies. I had lots of left-over pie dough after class to play with so I made a fresh cherry pie (pictured at the start of this post) for my family 4th of July gathering. More on that later.
I learned a lot from the two classes and walked away with loads of tips from each. In some ways, the instructors contradicted each other just a bit. For example, at Sur La Table we were encouraged to start with a disc of dough if we wanted a round piece of dough when we finished rolling, or a square if you wanted a square piece when finished. To me, this made a lot of sense. At Gourmandise, we started with somewhat triangular wedges (we cut each disc into quarters to begin rolling) which to me made things a bit more difficult. In both classes, however, we got great tips which enabled us to roll out the dough in such a way that it remained flaky and baked up nicely. Other differences I think were based on the preferences and experience of the instructor and I just needed to decide for myself. One example is cutting your butter into cubes instead of starting with whole sticks. I don’t think you can skip cutting the butter into the cubes if you are using a machine. A second difference is using an egg wash versus milk. Either wash will work and provide good results as confirmed in Art of the Pie by Kate McDermott, but I think I have a preference for the nice shine you get from an egg wash.
Strawberry-Rhubarb Pies from cooking class at Sur La Table
One of the things I loved about the Sur La Table class is that we were able to get hands-on experience with four different methods of preparing dough — strictly by hand, by hand with a pastry cutter, with a food processor, and with a stand mixer. Before attending class, I was a food processor method aficionado. Now, I prefer the mixer approach with my KitchenAid stand mixer. It is nice and neat (unlike the hand methods) and I get an even flakier result that I was getting with the food processor. We also got to make a sweet tart dough which was delicious with the ganache and caramel tarts.
Overall I was also very pleased with the Gourmandise experience. For me, they are a great local resource but in my opinion, one of the greatest testaments to the quality of their culinary program is the fact that we had a number of attendees traveling 60+ miles by car to attend, and one attendee who flew in from Austin, TX. The in-class discussions about different types of flours, fats, and pie pans were really helpful. We were encouraged to be confident when working with our dough (I was a bit timid) as it can smell fear a mile away .
This Strawberry-Rhubarb Pie has been brushed with egg wash and is oven readyDuring baking, the juices from this pie bubbled out all over my baking sheet, and it was still too runny
After attending any class or lesson I believe that you need to put your newly gained knowledge to work. In this case, it meant making more pies at home. Following the Sur La Table class, I decided to make a Strawberry Rhubarb pie at home using their recipe. Although it worked, I had way too much liquid in the pie filling after baking so that was a disappointment. If I were to make this one again, I would need to use more thickener as the amount in the recipe clearly wasn’t enough.
I still had a bit of pie dough leftover and decided to use it for a small blueberry pie. Since I had a small amount of dough, I used a small oval baking dish and just under a pint of berries. After the watery filling with the Strawberry Rhubarb pie, I decided to try tapioca flour as the thickener with the blueberries and it worked but I still had juices overflowing. I didn’t really follow a recipe, rather I improvised from a recipe in The Art of the Pie using 2 tablespoons of sugar, 2 teaspoons of tapioca flour, a few drops of lemon juice, a pinch of nutmeg and about a teaspoon of Grand Marnier. This was delicious although the filling bubbled up over the decorative flowers I made as I was short on dough. Definitely, needs more dough — overlapping flowers would have helped reduce or elminate the overflow..
Small Blueberry Pie Ready to Bake
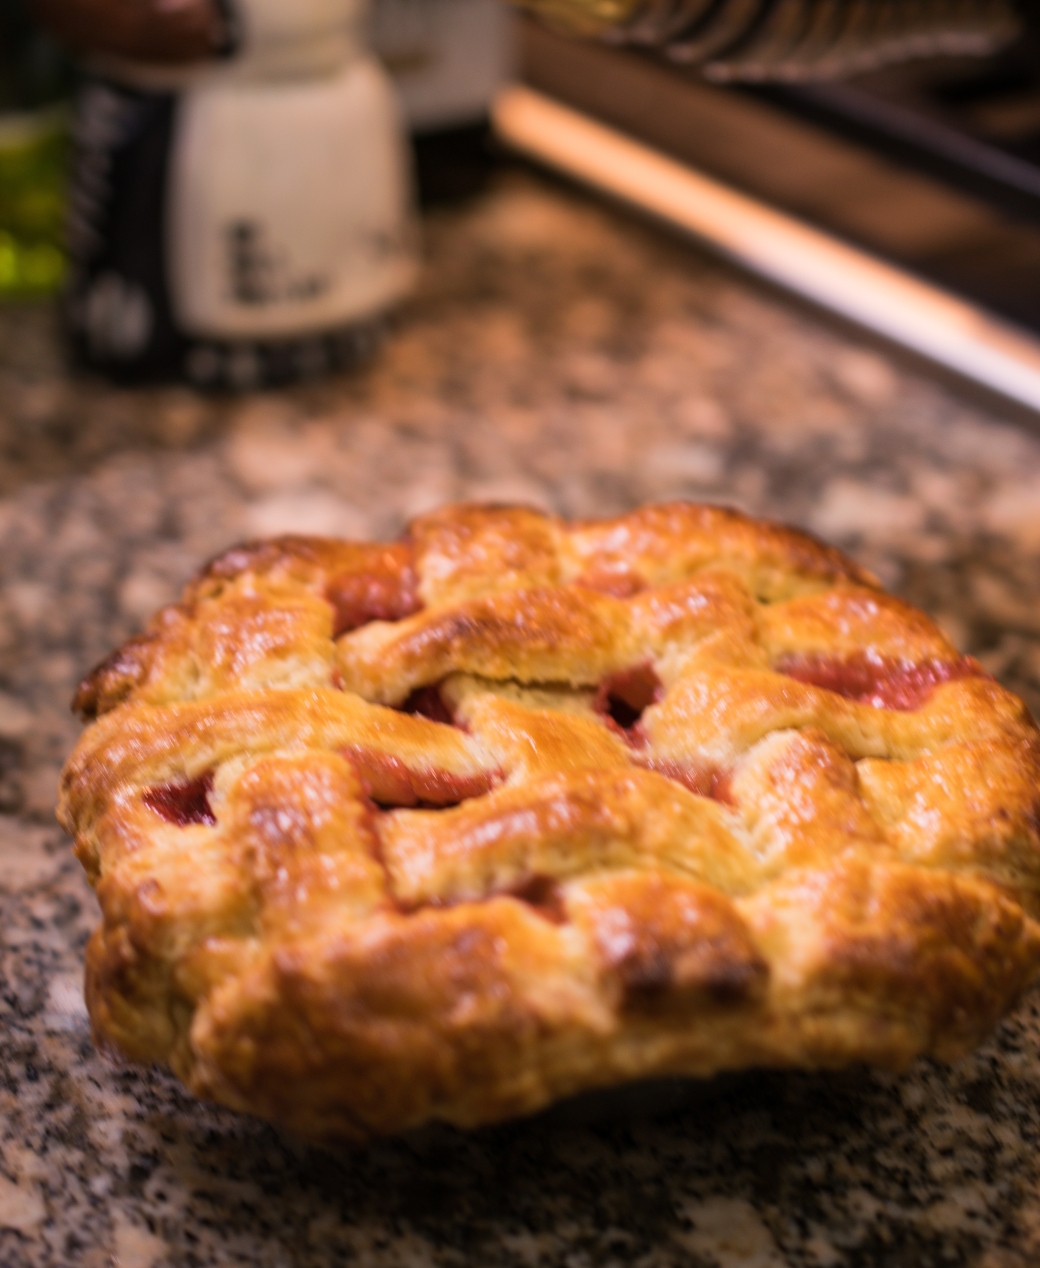
My latest pie creation is a fresh cherry pie with a lattice crust
After the class at Gourmandise, I made the cherry pie pictured here and at the top of this post. I used leftover dough from class and followed the recipe linked to above from Art of the Pie. This pie was a real crowd pleaser with very positive critical feedback from my uncle. His feedback was that the dough needed more salt (I agreed). I took some more of the remaining dough, rolled it out after sprinkling with freshly ground sea salt and used it for a mini pie with a bit of leftover cherry filling and it was fantastic! By the way, for this lattice pie I rolled my dough into a square before cutting the strips which worked really well. Notice that this pie did not have juices running over. I bought a pie bird to help with this problem, but I forgot to use it. Fortunately it wasn’t really necessary this time around.
By the way, the book Art of the Pie has been a great resource for me. I think a hands-on class like one of the two I took is really helpful and provides supervised hands-on experience. The book, however in my mind really shines when it comes to the recipes. I wasn’t really blown away by any of the fruit pie recipes from the classes, but when I’ve followed Kate’s recipes at home I’ve had great results (like that fresh cherry pie following this recipe or the fresh apple pie you can read about in the post about my 2017 #piegoals). This fresh cherry pie was my latest, and tastiest fruit pie ever. I did not experience any overflow from the juices so it was neat and tidy unlike the two prior baked-at-home pies.
Whew, it has been a busy pie baking summer. I have plans for a savory summer pie as well as a review of some of my favorite pie making tools that I will share soon. Be sure to follow the blog or you can follow me on social media to stay up to date. In the meantime, enjoy the remainder of summer and take advantage of the season’s bounty. Enjoy life, eat more pie!
Here in the U.S. we are about to enter the long July 4th holiday weekend, and we also have the Wimbledon tournament starting up. The upcoming start of Wimbledon reminded me of the classic tournament beverage — the Pimm’s Cup. These drinks are sold all over the grounds of the All England Lawn and Tennis Club and are traditionally garnished with fresh strawberries which are also a mainstay at the tournament. According to an article on the Trip Savvy website, Wimbledon is the largest annual sports catering event in Europe, and in 2015 320,000 glasses of Pimm’s were sold which makes it the second most popular beverage sold on site – 330,000 cups of tea and coffee were sold.
What is Pimm’s, or more specifically Pimm’s No. 1 which is the original formula you might ask? It is a gin-based “tonic” or herbal remedy first developed in 1823 to aid the digestion. This combination of gin and herbs became popular in England, and is often served as a mixed drink in a cup with either lemonade or ginger beer and garnished with assorted fruits. There are many recipes or approaches to making the drink so I will share mine with you here.
The version I prepared for this post used a ginger beer from a company called Q Drinks. This beverage is intended to be a mixer, and has a very spicy ginger taste and lots of carbonation. Other ingredients in the Q ginger beer include agave, coriander, cardamom, lime, and chili peppers. To prepare the cup, I used 1 part Pimms to 3 parts of the ginger beer.
Ingredients for 4 tall glasses as shown:
Two key ingredients for my version of the classic Pimm’s Cup
4 ounces Pimm’s No. 1
750 ml bottle Q Drinks Ginger Beer, chilled
Strawberries (6-8)
Orange
English cucumber
Mint (4-6 sprigs)
Preparation:
Cut up a 3-4” piece of the cucumber and place it in a glass or measuring cup with 4 ounces of Pimm’s and a sprig of the mint. Muddle these and set aside to “stew” for a few minutes while you prepare the other ingredients.
Halve the strawberries, slice the orange and the cucumber. Aim for a couple of strawberries and a couple of slices of the orange and the cucumber for each cup.
Add crushed ice to each of your serving glasses, as well as the fruit and cucumber.
Strain the Pimm’s and pour 1 ounce into each glass.
Did you know that one in four women report experiencing domestic violence in their lifetimes, and that finances are the number one reason that victims can’t just leave? I had the opportunity last week to see a very moving video from the Allstate Foundation which provides a view into the life of a victim through her lost purple purse. This video is less than 3 minutes long, but a powerful eye opener. Please take a look and consider how you can help and reshare this post freely. Thanks!
In golf, as in life, it is the follow through that makes the difference.
Dr. Seuss
One of my planned chores this weekend was to clean out and re-stock my golf bag. I had a good excuse for not getting the job done as scheduled since our building elevator was out of order and getting my big stand bag full of clubs upstairs would not have been simple or easy. Now that the elevator has been repaired, it’s time to get down to business.
I’ve been inspired to give my bag a thorough cleaning and re-stocking as I recently joined the Executive Women’s Golf Association (EWGA) in an effort to get serious about improving my golf game and expanding my business network. If you’re not familiar with EWGA, it is an international community which promotes the game of golf and provides business networking opportunities for women. I thought this post might be useful to other women golfers and have modeled it after a segment on Tennis Channel called “bag check” where they give you a peek inside a pro’s bag. BTW, I am not a pro by any stretch of the imagination. I am, however, one of those women who carries a well-stocked handbag. Not as well stocked as my Nana who would likely have a few liverwurst sandwiches, a boiled egg, etc. wherever she went.
In random order, these are the nine key types of items I want to always have in my bag. The items may be different for you, so feel free to customize to suit your needs. I will often package up a group of items in a ziplock bag to keep things neat and tidy in my bag.
“Essential” toiletries include lip gloss/moisturizer, hand cream, insect repellant, and sunscreen. The insect repellant and sunscreen are kinda obvious and apply equally to men and women. The lip products and hand cream are personal pet peeves of mine. I suffer from dry hands and lips so I don’t want to be distracted by those types of annoyances when they can be prevented so easily. Your essentials may be entirely different, and there is no judging coming from me. Golf is hard enough without losing focus due to relatively petty annoyances.
Zyrtecor your antihistamine of choice if you’re an allergy sufferer. I’m allergic to weeds, trees, and grasses. I haven’t seen a golf course yet without at least two of the three — I’m giving the benefit of the doubt here and assuming there are a few courses somewhere that are 100% weed free. I get individually packaged tablets (samples) from my allergist periodically and stick those in my golf bag. Useful in case I forgot to take one before leaving the house, or if I feel the need to double up. You may also want to consider Tylenol, a mini first aid kit or whatever helps you feel prepared.
You never know when you’ll need tissues, and with my allergies I know I need to have them on hand. I always need to work at keeping these in my bag lest I end up with strips of TP out on the course. Also handy if you’re on a public course where they’ve run out of TP . I buy the small purse size packets in bulk. I also carry individually wrapped wipes like Wet Ones which I buy at Target. You never know when you might need or want a quick cleanup.
Tech stuff, including earphones, a spare battery and charging cable. The earphones are useful to have for practice on the driving range or for putting practice. I went to a short game clinic a couple of years ago where it was recommended to practice your putting with a metronome to help reinforce your putting rhythm. I still do this, and it really does help. I have a free app on my iPhone that I use called MetroTimer. When I’m on the practice putting green, I plug in the earphones and turn on the app (I set it to 75 Beats Per Minute or BPM). Try this, it really works. If you’d like to learn more about this, click here for a video from The Golf Channel. I also carry a spare battery and charging cable for my phone. I don’t use a GPS device for distances or keeping track of my score, instead, I use an app on my phone called GolfLogix (available for iOS and Android) This type of app will chew up your battery so I always try to start with a fully charged battery and case. The “candy bar” charger is for extra insurance.
I always have a selection of practice aids including my range key on hand. I don’t always have all of them with me, but I’ll have at least a few. My favorite is the PVC pipe alignment tool (see photo below) that I was given in a short-game clinic a couple of years ago. You can easily pick up the parts needed at your local hardware store and make your own. The other interesting item in the photo below is a Putter Wheel which helps with your putting and can make a huge difference in your final score.
Basic golf supplies including ball markers, tees, balls, and gloves. The list here could get long, but you get the idea.
Miscellaneous items I like to have for my comfort include a case for Sunnies, spray cleaner and cleaning cloth. I also have a set of Nike sleeves, a golf umbrella, and a cooling towel. I would also recommend that you include a supply of business cards for networking opportunities after your round.
Although you won’t find me with a liverwurst sandwich, snacks, beverages and Altoids are typically in my bag. For snacks, I love the individually packaged trail mixes at Trader Joe’s and Kind bars that I pickup from Costco.
Last but not least, you can carry 13 clubs in your bag, and this was one of the things I focused on relatively early. Prepackaged sets of clubs may have as few as 7 clubs so you really want to figure out where the gaps are in your bag and close those as soon as you can. When I first began to play, the first “extra” club I purchased was a used 60° lob wedge. I needed a bit of extra loft for my short game and that club became one of my favorites. When I finally upgraded to a custom fit set of Mizuno’s I passed that wedge along to a playmate who came to love that club. She still plays with it.
Photo of some of the items I carry in my golf bagFinally, if you are looking to make some additions to your bag or your golf wardrobe I have a referral link from one of my favorite online women’s golf retailers. This link from Golf4Her will give you a 10% discount off of your purchases. I’m itching now for a new push cart and some new clothes.
Did I miss anything? I know that I’m not traveling light, but I was a girl scout and our motto was to always be prepared. Let me know your thoughts…I’d love to have a list of ten.
“Blues is to jazz what yeast is to bread. Without it, it’s flat.”
Carmen McRae
Crispy on the outside with a soft moist interior. Wow, our assignment this month was a big winner! Our June Rose’s Bread Bible Bakers assignment was for a fantastic Potato Buttermilk Bread. It was similar to the Olive bread we made a few months back in that it uses a biga or starter so you’ll want to allow plenty of fermentation time for full flavor development. The addition of buttermilk and potato flour gave this loaf a nuanced, but lovely flavor and tenderness. Rose warns in her introduction to the recipe that the potato flour promotes a very brown crust, and it certainly does. Watch this one carefully while it’s in the oven.
As with the Olive bread mentioned above, I used the King Arthur Flour Artisan Bread Flour with outstanding results as usual. I also tried their dried buttermilk powder for the first time which worked well, and I believe I will buy more once I use this up as it is much more convenient than having to go to the store for buttermilk since it isn’t a staple in my refrigerator. For the potato flour, I picked up a bag from Bob’s Red Mill at my local Whole Foods.
Since I had not baked this bread before, followed all of the directions to the letter until it was time to bake the bread. I always love using the La Cloche for the artisan-type free form breads. For some reason, I forgot to put the bread on the La Cloche base, and placed it directly on the hot baking stone that I had preheated with the dome. As a result, I did have a bit of scorching on the bottom of the loaf, but it still turned out fantastic. I baked the loaf under the dome for 25 minutes after lowering the temperature, and had I left it any longer I believe it really would have burned.
Potato Buttermilk loaf after the second rise
By the way, this bread used a good bit of vital wheat gluten which I suspect is essential. My doughs typically rise in far less than the suggested time. If a recipe says allow 1-1/2 hours, mine is often ready in 45 to 60 minutes. Not so with the first rise on this one. It took the full recommended time for the first rise, but the second rise did happen a little more quickly.
A lovely ham sandwich
If you follow my bread posts, you’ll know that any bread I make is likely to end up in a sandwich, and this one was no exception. In addition to the ham sandwich shown, it made a fantastic grilled cheese. Rose says that this bread does not freeze well and is best eaten within a day. I recently got a new bread keeper from King Arthur, and it has done a stellar job keeping this bread fresh for two days so far. I’m confident that this tasty bread will be gobbled up before it has a chance to go bad.
If you’re interested in trying the recipe, you can find it here. You won’t be disappointed. Let me know if you try it.


 Another way to speed things up is by asking your seafood vendor to steam, clean, and crack the lobsters for you. This will save you a bit of prep time and you can use the largest shells when you prepare the cream sauce. I keep a jar of Better than Bouillon lobster base in my refrigerator and add a touch of it to the sauce for an extra rich cream sauce. One important change that I recommend is to lightly saute all of the vegetables, not just the mushrooms as you prepare to assemble the pies. Once the pies are assembled, you can sit back and relax while they bake and await the compliments. Enjoy, and have a fantastic Valentine’s Day!


 Preparing the dough was simple and straight forward, although I did feel there was a little less dough than normal for my loaf pan, and that it was a bit slow to rise. Once the dough went in the oven it was necessary to reset the timer and change the temperature several times. This bread really does brown quite a bit, and I fought the urge to tent it with foil as Rose did indicate that it browns quickly which is why the multiple temperature changes are needed. When I took it out of the oven I was a bit concerned about the color and whether it would taste burnt — the color of the crust did not seem to impact the deliciousness of this bread in the least.


 The
The 


 Here in the U.S. we are about to enter the long July 4th holiday weekend, and we also have the Wimbledon tournament starting up. The upcoming start of Wimbledon reminded me of the classic tournament beverage — the Pimm’s Cup. These drinks are sold all over the grounds of the All England Lawn and Tennis Club and are traditionally garnished with fresh strawberries which are also a mainstay at the tournament. According to an article on the Trip Savvy


 I’ve been inspired to give my bag a thorough cleaning and re-stocking as I recently joined the


 As with the Olive bread mentioned above, I used the

